
When you’re shooting for clients, the edit is half the job. And if you’re still editing every single image one at a time, you’re quietly bleeding hours you’ll never bill back. I know because I did it that way for two years. I had a 47-item client delivery checklist and somehow “fix the workflow” never made it to the top until I started looking hard at where my time actually went. Spoiler: it was Lightroom.
In this Aaron Nace (PHLEARN) tutorial, Watch the full tutorial on YouTube, Aaron walks through how to import and batch-edit over 100 images from a single portrait shoot. The subject is a health coach who needed photos for his website and social media. Practical, real-world use case. The techniques he covers apply directly to the kind of client work most of us are doing every week.
What I want to do here is walk you through the core steps so you can follow along without pausing the video every 30 seconds. I’ll also add a few notes from how I’ve adapted this in my own studio workflow.
Step 1: Import Your Images the Right Way
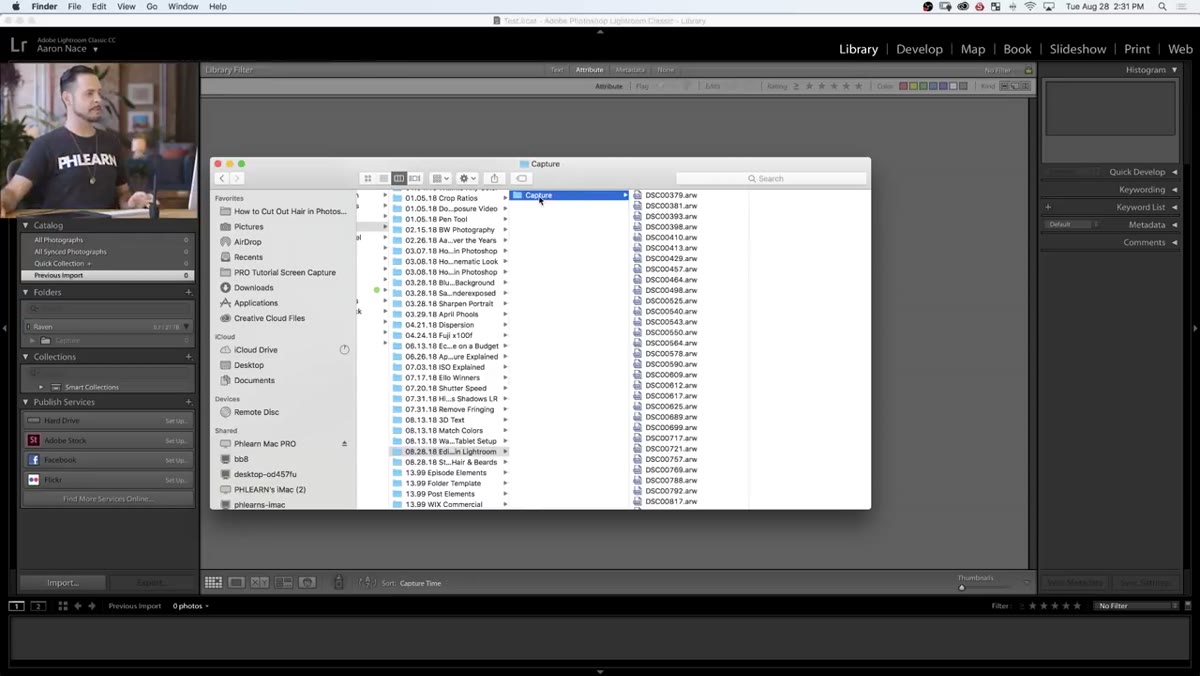 Dragging a folder of images into Lightroom’s import dialog
Don’t just drag your files in and click Import as fast as possible. The import dialog is where you set yourself up for success or quietly create problems you’ll deal with later. Aaron chooses “Minimal” previews on import rather than Standard or 1-to-1. The reason is smart: since you’re about to edit these images anyway, Lightroom will have to regenerate any previews you build now. Building them upfront wastes time. Skip it. Build previews after the edit is done.
Dragging a folder of images into Lightroom’s import dialog
Don’t just drag your files in and click Import as fast as possible. The import dialog is where you set yourself up for success or quietly create problems you’ll deal with later. Aaron chooses “Minimal” previews on import rather than Standard or 1-to-1. The reason is smart: since you’re about to edit these images anyway, Lightroom will have to regenerate any previews you build now. Building them upfront wastes time. Skip it. Build previews after the edit is done.
Step 2: Embed Copyright Metadata on Every Import
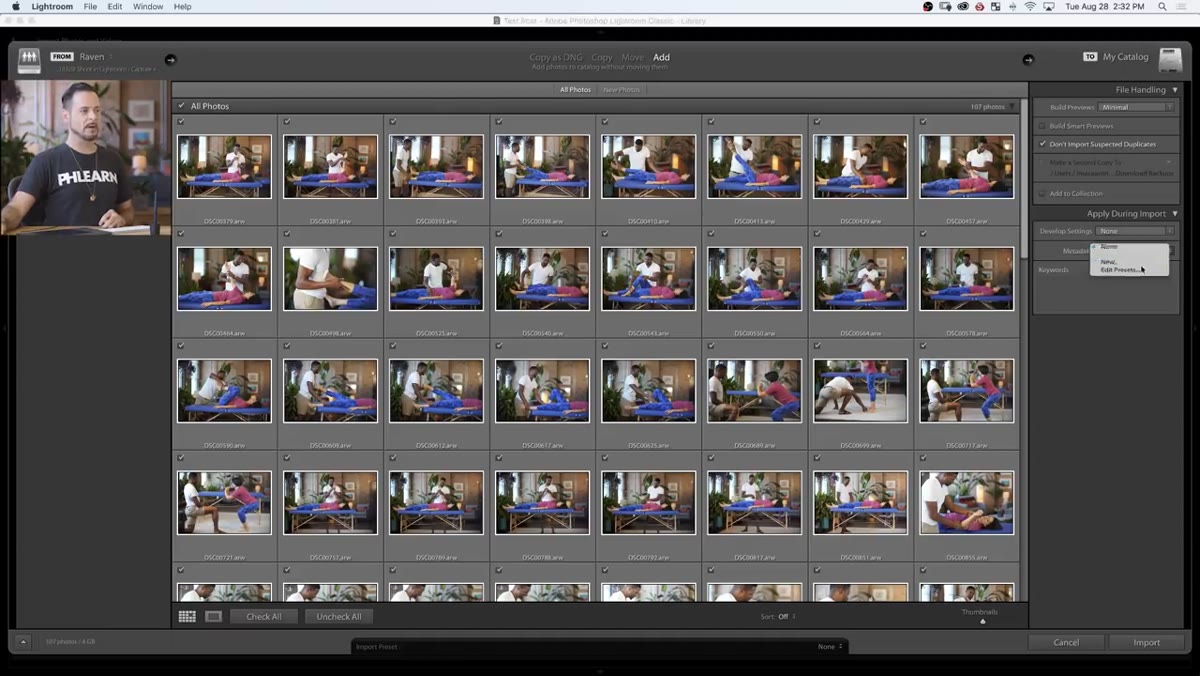 Creating a new metadata preset in the import dialog
Under the “Apply During Import” section, go to Metadata and create a new preset. At minimum, enter your name and set the copyright status to “Copyrighted.” This takes about 90 seconds to set up once, and then it applies automatically to every image you ever import after that. If you’ve ever had an image used without credit or compensation, you already understand why this matters. If you haven’t yet, just trust me and do this now.
Creating a new metadata preset in the import dialog
Under the “Apply During Import” section, go to Metadata and create a new preset. At minimum, enter your name and set the copyright status to “Copyrighted.” This takes about 90 seconds to set up once, and then it applies automatically to every image you ever import after that. If you’ve ever had an image used without credit or compensation, you already understand why this matters. If you haven’t yet, just trust me and do this now.
Aaron also adds keywords at this stage. For this shoot, he tags the client’s name so he can search for those files quickly later. I do the same thing in my studio, and I tag by shoot type as well (headshots, family, brand, etc.). It costs nothing at import and saves real time at delivery.
Step 3: Develop Your Baseline Edit on One Image
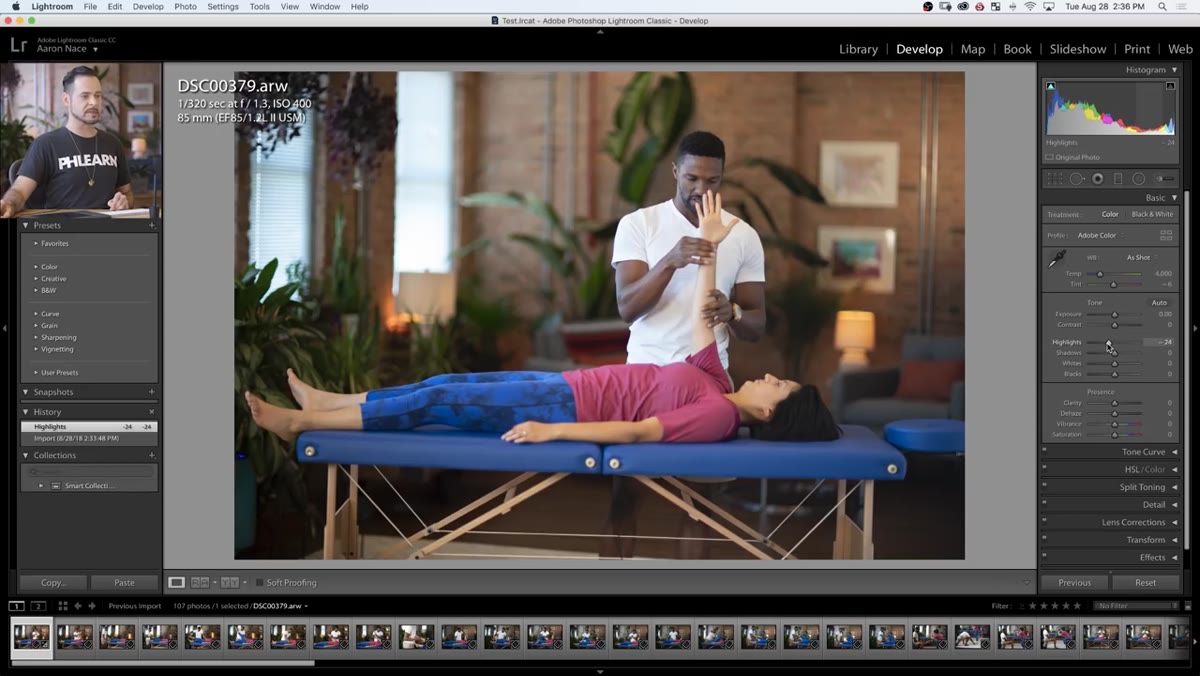
 Opening the first image in Lightroom’s Develop module
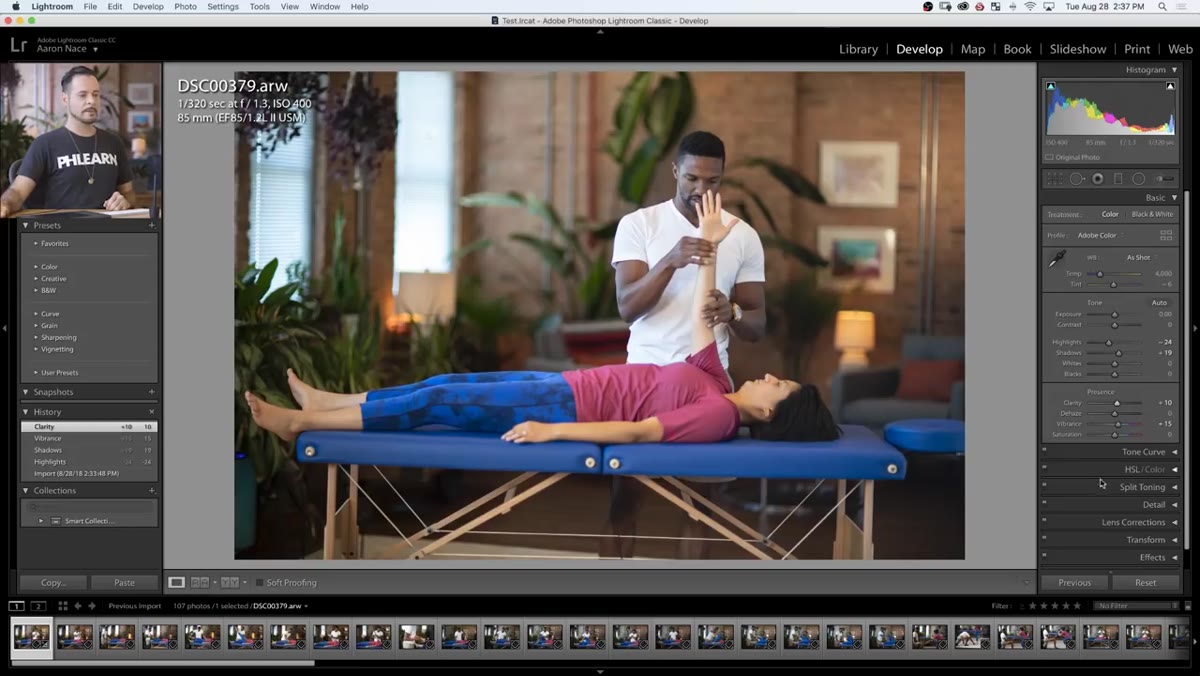
Once your images are imported, open one photo in the Develop module. You’re not trying to perfectly finish this image. You’re building a baseline look that will apply across the whole set. Aaron starts with the histogram, with shadow and highlight warnings turned on. He pulls highlights down slightly to recover any clipped areas, then lifts the shadows to open up the darker parts of the frame.
Opening the first image in Lightroom’s Develop module
Once your images are imported, open one photo in the Develop module. You’re not trying to perfectly finish this image. You’re building a baseline look that will apply across the whole set. Aaron starts with the histogram, with shadow and highlight warnings turned on. He pulls highlights down slightly to recover any clipped areas, then lifts the shadows to open up the darker parts of the frame.
His goal for this shoot is a bright, open, natural-light feel. So he also bumps Vibrance to add color life without oversaturating skin tones. Vibrance is smarter than Saturation for portraits because it protects the hues that are already intense, which usually includes skin. Make small adjustments here. You’re setting a tone for the whole series, not painting a single hero image.
Step 4: Sync Settings Across All Images
 Applying baseline develop settings across multiple selected images
Here’s where the time savings actually live. Once your baseline edit looks right on that first image, select all the images in the shoot (Ctrl+A or Cmd+A), then use Lightroom’s Sync Settings function to copy those develop adjustments across every file at once. You can choose exactly which settings to sync. If you adjusted exposure, highlights, shadows, and vibrance, sync those. If you haven’t touched the tone curve, leave it unchecked so you don’t overwrite anything you might have set on individual images.
Applying baseline develop settings across multiple selected images
Here’s where the time savings actually live. Once your baseline edit looks right on that first image, select all the images in the shoot (Ctrl+A or Cmd+A), then use Lightroom’s Sync Settings function to copy those develop adjustments across every file at once. You can choose exactly which settings to sync. If you adjusted exposure, highlights, shadows, and vibrance, sync those. If you haven’t touched the tone curve, leave it unchecked so you don’t overwrite anything you might have set on individual images.
This is the single step that turns a four-hour editing session into a 45-minute one. I’ve run the numbers in my own studio. Batch syncing a 120-image portrait shoot takes me under two minutes. Editing that same shoot image by image used to take me the better part of an afternoon.
Step 5: Use Custom Local Adjustment Brushes
 Creating and applying a custom brush preset in the Develop module
The global adjustments you’ve synced are your foundation. But clients want a little more than flat, even processing. Aaron shows how to create custom brush presets inside the Develop module to apply targeted adjustments, like brightening a subject’s face or softening a background, to multiple images quickly. You create the brush settings once, save them as a named preset, and then you can apply them with a few clicks on any image in the series.
Creating and applying a custom brush preset in the Develop module
The global adjustments you’ve synced are your foundation. But clients want a little more than flat, even processing. Aaron shows how to create custom brush presets inside the Develop module to apply targeted adjustments, like brightening a subject’s face or softening a background, to multiple images quickly. You create the brush settings once, save them as a named preset, and then you can apply them with a few clicks on any image in the series.
For portrait clients specifically, I keep brushes saved for: skin brightening, eye clarity, background darkening, and teeth whitening. These are the four adjustments I make most often, and having them pre-built means I’m not tweaking sliders from scratch on every single face.
A Note on What This Workflow Means for Your Pricing
Aaron’s tutorial is about technique. But I want to point something out that doesn’t show up on screen. When you can edit 100 client images in a single focused session rather than across multiple exhausting evenings, your effective hourly rate on that job goes up. A lot.
I track my hours on every job, because my accountant husband pointed out early on that the jobs I thought were my best-paying ones weren’t actually the most profitable when I factored in editing time. Batch workflows like this one changed that math. If you’ve been undercharging because editing feels like it takes forever, part of the fix is operational, not just financial. Get the hours down, and suddenly your current rates look a lot healthier.
I’d also add: consistent editing across a client’s gallery is a signal of professionalism. When every image has a coherent look, clients notice. They may not say “your Lightroom workflow is cohesive,” but they will say “these photos all feel like they go together,” and that’s the feeling that gets you referrals.
The biggest takeaway from this tutorial is that professional-level Lightroom editing for clients is not about spending more time. It’s about making the right decisions once, then applying them systematically. Nail your baseline on one image. Sync it. Build your brush presets. Repeat.
Watch the full tutorial on YouTube to see Aaron work through the full 107-image shoot in real time. The visual of watching the sync happen across an entire catalog is worth seeing once, even if you already understand the concept.
Comments
Leave a Comment