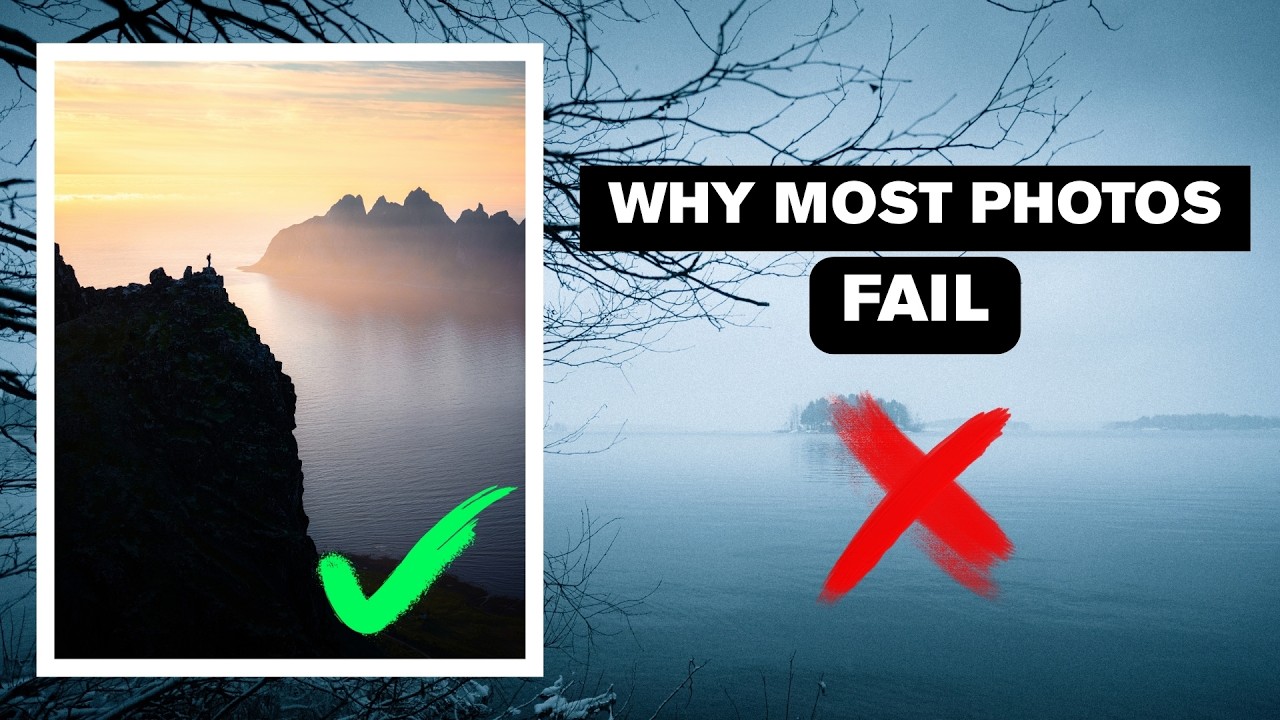
I run a portrait studio, so you might wonder why I’m spending time on a landscape photography tutorial. Here’s the honest answer: the gap between a technically correct photo and one that stops someone mid-scroll has nothing to do with genre. It’s the same problem my portrait clients describe when they hand me their phone and say, “I take pictures of my kids all the time but they never look like yours.” They’re not missing a better camera. They’re missing a framework for making a photograph actually say something.
Watch the full tutorial on YouTube
In this Hugo Korhonen tutorial, he lays out what he calls the Story Triangle, a three-element framework for making images that evoke genuine emotion rather than just documenting a scene. Hugo has been shooting for nearly nine years and teaches photographers how to create work that moves people. The framework applies whether you’re photographing the Dolomites or a newborn in a Miami hospital room. I’ve been recommending this video to students in my business workshops because the problem he names in the first 30 seconds is the same one killing the portfolios of photographers who wonder why they can’t book premium clients.
Step 1: Diagnose the Real Problem With Your Images
 Photographer looking disappointed at camera screen outdoors
Before you can fix anything, you need to name what’s actually wrong. Hugo opens by ruling out the usual suspects: your settings are fine if you’ve learned them, and your gear isn’t the issue. The actual problem is that your photos are technically competent but emotionally inert. They’re snapshots, not stories. You stood somewhere beautiful, you got the exposure right, and you came home with a photo that makes you shrug.
Photographer looking disappointed at camera screen outdoors
Before you can fix anything, you need to name what’s actually wrong. Hugo opens by ruling out the usual suspects: your settings are fine if you’ve learned them, and your gear isn’t the issue. The actual problem is that your photos are technically competent but emotionally inert. They’re snapshots, not stories. You stood somewhere beautiful, you got the exposure right, and you came home with a photo that makes you shrug.
That diagnosis matters because it redirects your energy. If you keep thinking the problem is equipment, you’ll spend money instead of developing skill. The question to ask yourself before every shoot is not “do I have the right lens?” but “does this image communicate something to someone who wasn’t standing where I was standing?”
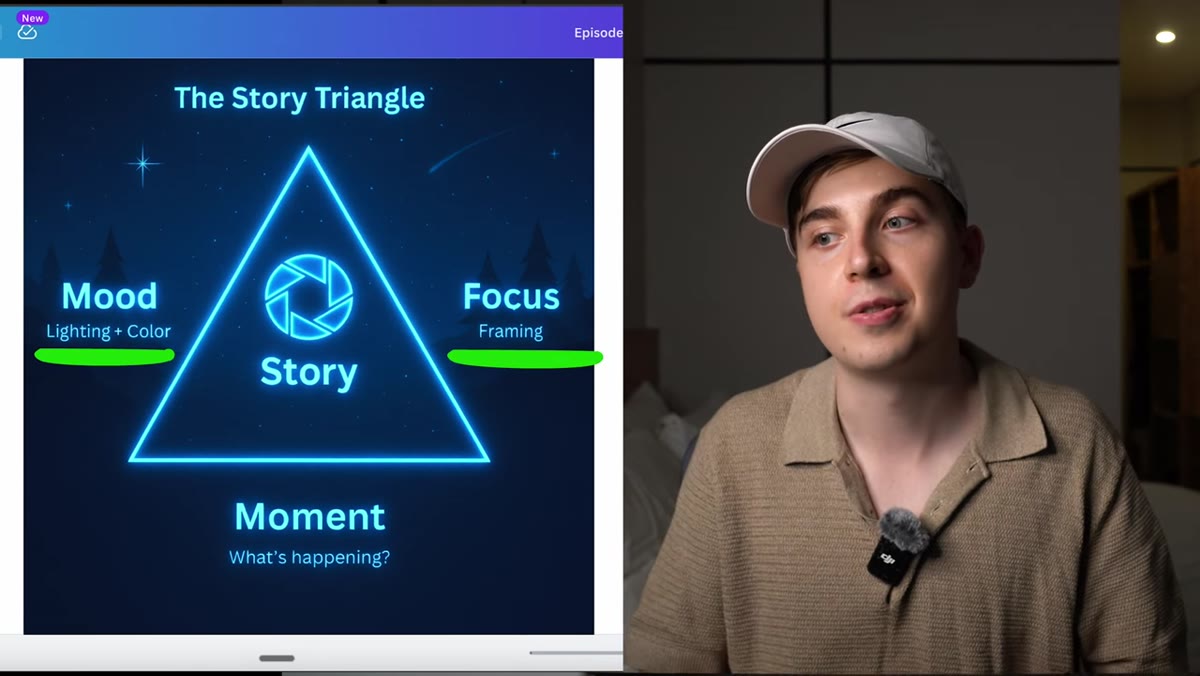
Step 2: Understand the First Corner of the Triangle — Mood Through Lighting
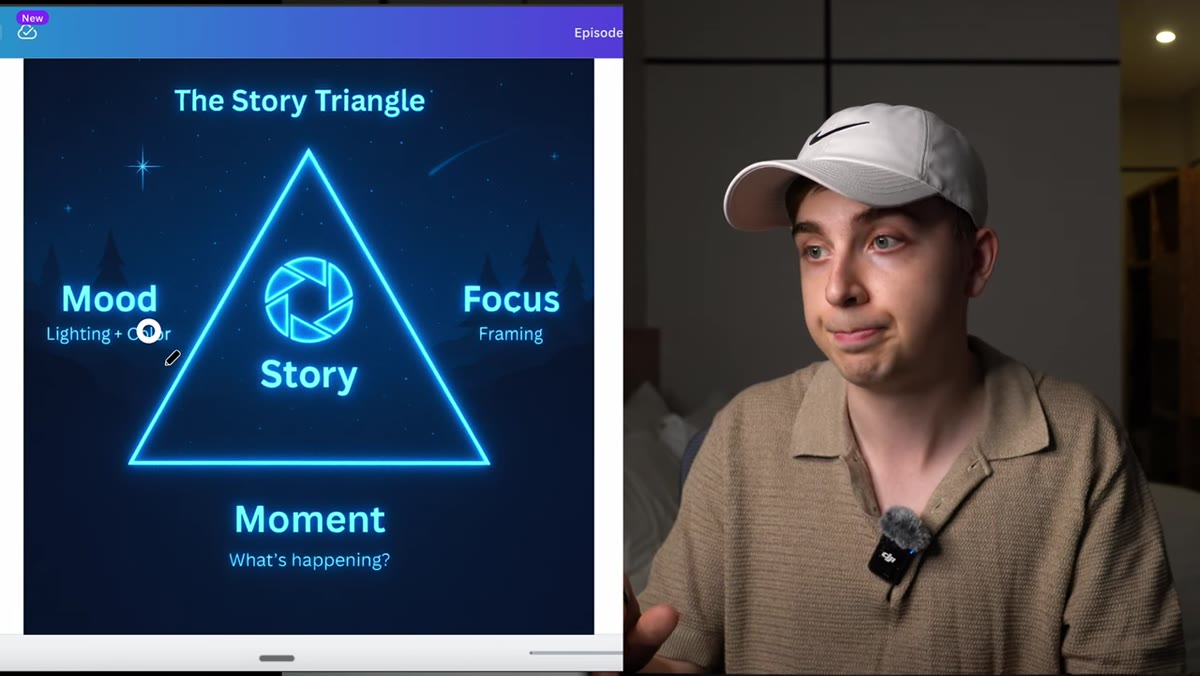 Triangle diagram with “Mood” element highlighted
Hugo defines mood as lighting and color working together, and he’s clear that lighting is the non-negotiable starting point. Bad light puts a ceiling on how good any image can be, no matter what you do in post. Professionals obsess over being at the right location at the right time because great light is not something you can manufacture after the fact. Golden hour, overcast diffusion, dramatic storm light, these are tools, and showing up when the light is doing something interesting is the first real decision you make as a photographer.
Triangle diagram with “Mood” element highlighted
Hugo defines mood as lighting and color working together, and he’s clear that lighting is the non-negotiable starting point. Bad light puts a ceiling on how good any image can be, no matter what you do in post. Professionals obsess over being at the right location at the right time because great light is not something you can manufacture after the fact. Golden hour, overcast diffusion, dramatic storm light, these are tools, and showing up when the light is doing something interesting is the first real decision you make as a photographer.
This means planning is part of the craft. Apps like PhotoPills or The Photographer’s Ephemeris will tell you exactly where and when the sun rises and sets relative to your location. Before your next shoot, block out 15 minutes to look at the light schedule and decide whether the conditions you’re likely to find are actually worth the trip. If the forecast says flat midday sun and no clouds, you have two options: wait for better conditions, or find a subject where flat light is an intentional creative choice, not a compromise.
Step 3: Use Color Deliberately, Not Accidentally
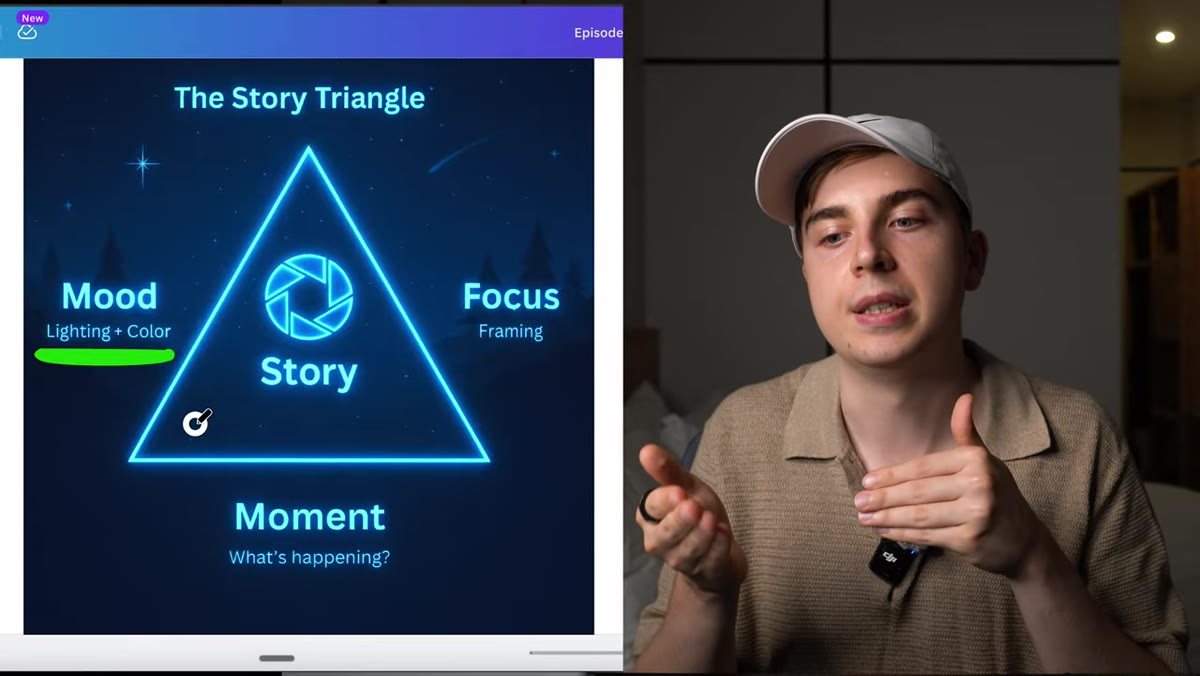 Discussion of color emotion in photography composition
The second half of mood is color, and this is where a lot of photographers leave significant impact on the table. Hugo’s point is straightforward: every other visual art form treats color as a conscious decision. Photography shouldn’t be any different. Warm tones read as inviting, energetic, nostalgic. Cool tones feel calm, melancholy, expansive. Desaturated palettes suggest timelessness or solemnity. If you’re not thinking about what emotional signal your color palette sends, you’re leaving that choice to chance.
Discussion of color emotion in photography composition
The second half of mood is color, and this is where a lot of photographers leave significant impact on the table. Hugo’s point is straightforward: every other visual art form treats color as a conscious decision. Photography shouldn’t be any different. Warm tones read as inviting, energetic, nostalgic. Cool tones feel calm, melancholy, expansive. Desaturated palettes suggest timelessness or solemnity. If you’re not thinking about what emotional signal your color palette sends, you’re leaving that choice to chance.
In practice, this means your editing decisions should be intentional rather than just “fixing” the image. When you open your raw file, ask what feeling you want the viewer to have, and then make color grading choices that serve that feeling. Pulling the shadows toward blue and the highlights toward amber is a technique. But it should be a technique you use because it reinforces the story, not because it looks nice in a preset you downloaded.
Step 4: Give the Viewer One Clear Focus
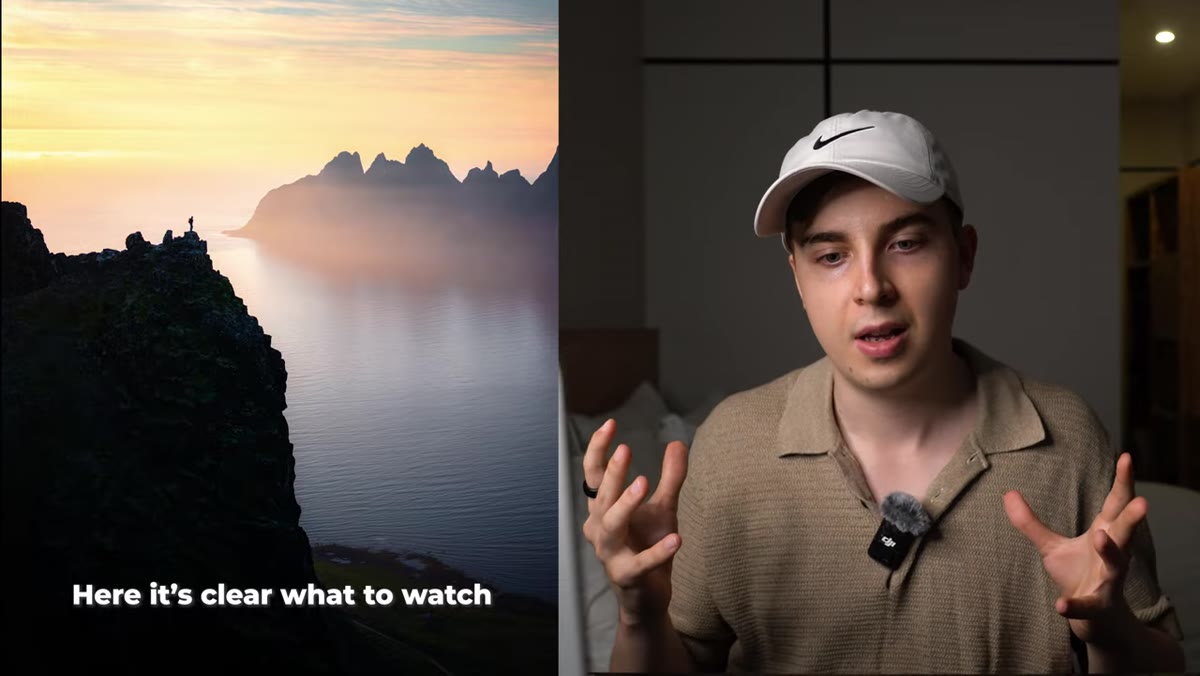
 Explanation of compositional focus and subject clarity
The second corner of Hugo’s triangle is focus, and he’s not talking about your autofocus system. He means: what is this photo actually about? The most common amateur mistake in landscape photography is trying to include everything because everything is beautiful. The result is an image where nothing stands out and the viewer’s eye wanders without landing anywhere satisfying.
Explanation of compositional focus and subject clarity
The second corner of Hugo’s triangle is focus, and he’s not talking about your autofocus system. He means: what is this photo actually about? The most common amateur mistake in landscape photography is trying to include everything because everything is beautiful. The result is an image where nothing stands out and the viewer’s eye wanders without landing anywhere satisfying.
Your job as the photographer is to make a decision on behalf of the viewer. Pick one subject, one moment, one thing you want them to notice first. Everything else in the frame should either support that subject or be removed from the frame entirely. This might mean moving left or right to eliminate a distracting element at the edge. It might mean getting lower to separate your subject from a busy background. It might mean waiting for a person or a bird to move into the right position. The edit happens in the field, not just in Lightroom.
Step 5: Build Depth With Layers
 Demonstration of foreground, midground, and background layering
Hugo’s third element is depth, created by building distinct foreground, midground, and background layers in a single frame. A photo with a strong subject but no foreground interest feels flat and disconnected. A photo where all three layers are working together pulls the viewer into the scene and creates a sense of actually being there.
Demonstration of foreground, midground, and background layering
Hugo’s third element is depth, created by building distinct foreground, midground, and background layers in a single frame. A photo with a strong subject but no foreground interest feels flat and disconnected. A photo where all three layers are working together pulls the viewer into the scene and creates a sense of actually being there.
Finding foreground interest is a habit you build by getting lower and looking for textural elements close to your lens, rocks, water, flowers, frost, anything that creates a leading line or a visual anchor near the bottom of the frame. Wide angle lenses amplify this effect significantly. A focal length between 16mm and 24mm will exaggerate the foreground while keeping the background in the frame, which is exactly the compression you want when you’re trying to build layers.
What I Tell My Own Students About This Framework
The Story Triangle works because it gives you a checklist to run through before you press the shutter, not after. In my portrait work, I’ve found that the photographers who struggle most are the ones who rely on post-processing to fix problems that should have been solved on set. The same principle applies here. If you’re in the field and your image is missing mood, missing a clear subject, or missing depth, no amount of editing will fully rescue it.
Where I’d extend Hugo’s framework for anyone building a photography business: your portfolio needs images that score well on all three corners. Not some images. Most images. Premium clients, whether they’re licensing landscape prints or booking portraits, are buying a consistent body of work. One stunning image surrounded by technically adequate ones tells a buyer that you got lucky once. A portfolio where every image tells a story tells them you have a repeatable process.
The single most important thing I took from this tutorial is that the gap between amateur and professional work is almost never technical. It’s intentionality. The professional made a series of deliberate decisions before the shutter clicked. The amateur hoped the scene would be enough.
Watch the full tutorial on YouTube and pay particular attention to how Hugo walks through real examples of the triangle working. Seeing it applied to actual images makes the framework click in a way that reading about it can’t fully replicate.
Comments (7)
I keep coming back to this article. It's that useful.
My workflow just got 10x faster. Not even kidding.
Clear and practical. No fluff. Appreciate that.
Quality content like this is rare. Keep it up.
This is fantastic. I've been recommending this approach to my readers too.
This saved me so much time on my last edit. Wish I'd found this sooner.
This should be required reading for anyone starting out.
Leave a Comment